- Menu
-
- English


Daily CPAP maintenance often feels like a relentless chore. Many users skip this vital step. Yet, ignoring this routine introduces high stakes for your sleep therapy. When you sleep, sweat, facial oils, and dead skin cells accumulate on the cushion. Over time, these residues break down delicate materials. This leads to air leaks and reduced pressure, which ultimately defeats the purpose of your treatment. Poor hygiene compromises therapy efficacy. It threatens your respiratory health. It also drastically reduces device longevity. Effective cleaning relies on consistency and safe materials. It does not require expensive automated shortcuts. This guide provides an evidence-based framework for daily and weekly maintenance. You will learn how to identify harmful cleaning methods. Finally, we will define exactly when you must stop cleaning and replace the equipment. Following these steps protects your health and your investment.
Daily removal of facial oils prevents silicone degradation and maintains seal integrity.
Warm water and mild, unscented soap remain the industry-standard, medically endorsed cleaning method.
Automated ozone and UV cleaners carry FDA warnings due to potential respiratory risks and material damage.
Cleaning cannot reverse physical wear; strict replacement schedules must complement hygiene routines.
Maintaining your sleep equipment goes far beyond simple aesthetics. Proper hygiene directly impacts how well your therapy works. If you neglect daily and weekly cleaning, you invite a host of mechanical and biological problems. These issues compromise your health and ruin expensive equipment.
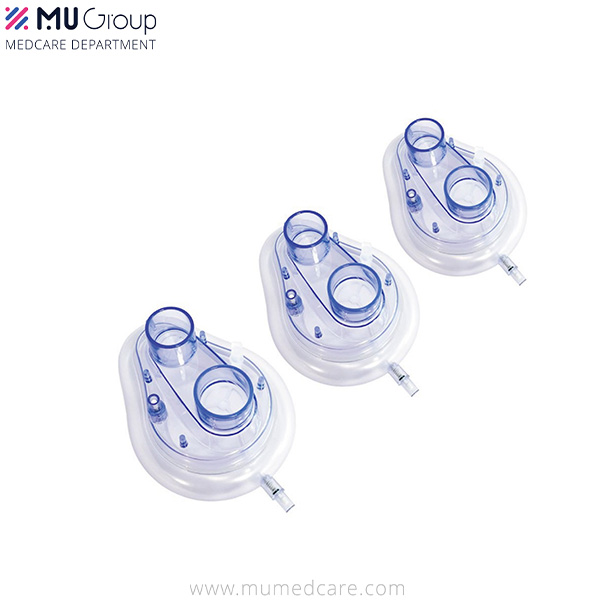
Your facial skin naturally produces oils and sweat. As you sleep, these substances transfer directly onto the silicone cushion. Silicone is a highly porous material. It easily absorbs facial oils, dead skin cells, and cosmetics. This chemical absorption degrades the silicone overnight. The material becomes soft, floppy, and structurally weak.
When the silicone loses its rigidity, the cushion can no longer form a tight seal against your face. Micro-leaks develop around the nose and mouth. Air escapes through these tiny gaps. Consequently, your machine cannot maintain the prescribed air pressure. This pressure drop triggers respiratory events, effectively undoing the benefits of your therapy. You will likely wake up feeling exhausted, despite wearing the equipment all night.
Your respiratory equipment creates a warm, highly moisturized environment. This microclimate is essential for comfortable breathing. However, it also creates the perfect breeding ground for dangerous pathogens. Bacteria, mold, and fungi thrive in these moist, dark spaces.
If you do not remove these pathogens through regular washing, they multiply rapidly. The machine then forces these microbes directly into your lungs. This clinical reality leads to severe upper respiratory infections. Users often experience chronic sinus congestion, sore throats, and even pneumonia. Cleaning your gear neutralizes this biological threat and protects your lungs.
Manufacturers build these devices to strict medical specifications. They also issue highly specific maintenance protocols. Failing to follow these approved guidelines carries significant consequences. Improper care can prematurely destroy the equipment. Furthermore, unauthorized cleaning methods often void manufacturer warranties.
Using an unapproved chemical on your CPAP Mask can cause immediate material failure. If a warranty claim reveals unauthorized maintenance, the company will deny a replacement. Consistent, approved hygiene practices keep you compliant and financially protected.
Hygiene Neglect Factor | Mechanical Consequence | Health Consequence |
|---|---|---|
Accumulated Facial Oils | Silicone degradation and severe air leaks | Reduced therapy pressure; daytime fatigue |
Trapped Moisture | Structural warping over time | Bacterial growth; sinus infections |
Harsh Chemical Use | Micro-tears in the cushion material | Skin irritation; chemical inhalation |
Consistency is the secret to effective maintenance. You do not need to spend hours scrubbing parts. You simply need a reliable, medically endorsed routine. We divide this routine into two distinct categories: daily maintenance and weekly deep cleaning.
Your daily routine should take less than one minute. You must focus entirely on the cushion. This part serves as the direct contact point between the device and your skin. It absorbs the bulk of your sweat and natural oils.
When you wake up, immediately detach the cushion from the frame. Wipe it down thoroughly. You can use an approved medical wipe designed specifically for this purpose. Alternatively, a clean, damp cloth works perfectly. This quick action immediately neutralizes oils before they can penetrate the silicone pores. Let the cushion air-dry on a clean towel. This simple daily habit prevents early material degradation.
Once a week, you must perform a comprehensive deep clean. This process removes trapped debris, mineral buildup, and hidden bacteria. Follow these standard steps to ensure optimal results:
Disassembly: Carefully separate the entire CPAP Mask into its individual components. You must isolate the cushion, the rigid frame, the fabric headgear, and the flexible tubing. Do not wash the unit fully assembled. Water will trap in the crevices.
Soaking Phase: Fill a clean basin with warm water. Add a few drops of approved soap. Submerge all non-electronic parts completely. Let them soak for 20 to 30 minutes. This duration loosens hardened organic matter.
Agitation: After the soak, gently massage the cushion and the fabric headgear. Use your fingers to rub the silicone surfaces. This physical agitation releases stubborn oils and trapped dead skin cells.
Rinsing & Drying: Remove the parts from the soapy basin. Thoroughly rinse every component under clean, running potable water. You must remove all soap residue. Finally, place the parts on a dry towel. Air-dry them strictly out of direct sunlight. Ultraviolet rays from the sun rapidly break down silicone and plastic.
The supplies you choose dictate the lifespan of your equipment. Many household cleaners seem harmless but act as destructive agents on delicate medical polymers. You must evaluate your cleaning solutions carefully.
Simplicity wins here. The most effective cleaning agent is mild, unscented dish soap. It breaks down grease without leaving dangerous residues. You can also purchase specialized medical detergents formulated specifically for respiratory gear.
Occasionally, you might notice stubborn mineral deposits or lingering odors. In these cases, you can use a 1:1 diluted mixture of white vinegar and water. Soak the parts in this solution for 15 minutes. However, you must follow this with a highly thorough rinse. Lingering vinegar can irritate your airway during the night.
Never use harsh household chemicals on your equipment. The following agents will permanently destroy your gear:
Alcohol and Bleach: These aggressive chemicals strip the moisture from silicone and plastic. The materials quickly become brittle. They develop micro-tears and eventually crack under pressure.
Antibacterial Soaps: These soaps contain heavy chemical agents. They leave residues behind. When you wear the device, you inhale these lingering antibacterial compounds, which can irritate your lungs.
Moisturizing Soaps: Soaps containing lotions or heavy oils leave a slippery film on the cushion. This film ruins the facial seal. The equipment will slide off your face during the night.
Every piece of medical equipment has specific material tolerances. You must align your cleaning choices with official guidelines. Always read the user manual. You should also check the official website of your specific CPAP Mask manufacturer. They provide precise lists of approved and banned substances. Ensuring your selected soaps do not violate material safety limits protects your warranty and your health.
The market is flooded with automated cleaning devices. They promise effortless hygiene at the push of a button. They use ozone gas or ultraviolet light to sanitize equipment. Despite their popularity, these machines carry severe implementation risks.
The U.S. Food and Drug Administration closely monitors respiratory safety. The FDA has issued multiple consumer updates regarding automated sanitizers. The official stance is clear: ozone gas and UV light devices are not legally cleared for cleaning respiratory equipment. The FDA has not proven them safe or effective for this specific medical use. Relying on them introduces unknown variables into your health routine.
Automated cleaners heavily damage equipment over time. Ozone is a highly reactive gas. It aggressively attacks polymers. When you expose your gear to ozone, the foam and silicone break down chemically. The cushions lose their elasticity. The internal seals within the machine degrade. This accelerated wear forces you to replace expensive components far more frequently than necessary.
Ozone poses a direct threat to human lungs. It is a known respiratory irritant. When you use an ozone cleaner, the gas penetrates the tubing and the water chamber. If you do not air out the equipment adequately before bed, residual ozone remains trapped inside. When you turn on the machine, you inhale this toxic gas directly. Users often report severe coughing, asthma flare-ups, and chest pain following ozone exposure.
Automated machines cost hundreds of dollars. They degrade your equipment faster, forcing you to buy more replacement parts. Furthermore, they introduce significant respiratory risks. In contrast, manual cleaning requires only warm water and cheap dish soap. Manual washing is inherently safer. It is clinically endorsed by sleep specialists worldwide. Ultimately, washing your gear by hand is vastly more cost-effective and reliable.
Hygiene is crucial, but it has limits. No amount of scrubbing can reverse physical wear and tear. You must recognize when a component has reached the end of its functional life. Transitioning from cleaning to replacing ensures your therapy remains effective.
Materials degrade naturally through repeated use. Fabric stretches. Velcro loses its grip. Plastic develops stress fractures. Once a component sustains structural damage, cleaning becomes pointless. You cannot wash elasticity back into a permanently stretched headgear strap. You cannot scrub away a micro-crack in a structurally compromised silicone cushion. Recognizing this point of diminishing returns saves you from ineffective therapy.
You should inspect your equipment during your weekly deep clean. Look for specific indicators of irreversible wear. Use the following criteria to evaluate your gear:
Cushion: Look for visual changes. A healthy cushion is clear and firm. A degraded cushion exhibits discoloration or a cloudy appearance. If the silicone feels overly soft, flimsy, or retains a sticky texture even after a thorough washing, it has failed.
Headgear: Test the fabric tension. If you have to pull the straps significantly tighter than when they were new, they have lost elasticity. Check the Velcro tabs. If they fray or pop open during the night, the headgear is compromised.
Frame: Inspect the hard plastic carefully. Look for hairline micro-cracks near the joints. Test the connection points. If the tubing clicks into the frame loosely or disconnects easily, the plastic has worn down.
The medical industry provides standardized replacement timelines. Insurance companies base their coverage schedules on these predictable wear patterns. Following this cadence guarantees optimal performance.
Equipment Component | Standard Replacement Cadence | Primary Reason for Replacement |
|---|---|---|
Silicone Cushions | Every 1 Month | Loss of structural integrity; inability to hold a seal |
Plastic Frames & Tubing | Every 3 Months | Micro-cracks; internal bacteria buildup in hose ridges |
Fabric Headgear | Every 6 Months | Loss of elasticity; Velcro degradation |
Take time today to audit your current equipment state. Compare your gear against the visual inspection criteria outlined above. If you notice discoloration, stickiness, or loose straps, do not attempt to clean them further. Instead, consult your durable medical equipment (DME) provider. Initiate a replacement order immediately if your criteria are met. Fresh equipment instantly restores therapy pressure and improves your sleep quality.
Proper sleep therapy relies entirely on the integrity of your equipment. The core strategy for success requires two distinct habits. First, you must commit to diligent manual cleaning using warm water and mild soap. This daily and weekly effort removes dangerous bacteria and neutralizes destructive oils. Second, you must adopt a ruthless replacement cadence. Cleaning simply cannot fix broken materials. We strongly urge you to inspect your current setup today. Look for irreversible wear on your cushions and straps. Browse certified replacement parts through your provider to guarantee optimal, healthy sleep therapy every single night.
A: No, you should never place any respiratory components in a dishwasher. Dishwashers utilize extreme high-heat cycles. This thermal exposure causes immediate plastic warping and permanent structural damage. Additionally, standard dishwasher detergents contain harsh bleaching agents and degreasers. These chemicals leave toxic residues on the plastic. You will inhale these residues during therapy, causing severe airway irritation.
A: Unscented and alcohol-free baby wipes are acceptable in a pinch. However, they are not ideal for long-term use. Manufacturers formulate dedicated medical wipes specifically to protect sensitive silicone. Baby wipes often contain mild moisturizers or aloe vera to protect human skin. These moisturizing agents leave a slippery film on the silicone cushion, which ultimately ruins the facial seal.
A: You must explicitly avoid boiling your equipment. Extreme heat permanently destroys the integrity of both plastic and silicone. Boiling water will instantly warp the rigid frame and melt the delicate cushion. The components will never fit together again. Warm water and mild soap provide more than enough cleaning power to remove pathogens safely.


